Showing posts with label ubuntu. Show all posts
, , , , ,

WAY TO VIEW WIREGUARD LOGS


IPTABLES

Similar to tcpdump, the LOG target of iptables allows you to log each packet that’s sent to and from WireGuard. Most Linux systems use iptables, or its newer sibling nftables, to define their firewall.


If you’re using iptables, you can run the following commands to add iptables rules that will log the header info of IPv4 packets carrying WireGuard encrypted content (where 51820 is the ListenPort in your WireGuard config):

# iptables -I INPUT -p udp --dport 51820 -j LOG --log-prefix 'wireguard iptables: ' --log-level 7
# iptables -I OUTPUT -p udp --sport 51820 -j LOG --log-prefix 'wireguard iptables: ' --log-level 7

If you’re using IPv6 networking, replace iptables with ip6tables; or if you’re using both IPv4 and IPv6, run both variants.

Once you do that, you’ll be able to see WireGuard packets logged to the kernel message buffer. If your system is set up with rsyslogd, journald, or a similar logging daemon, you can use it to see this logging. With rsyslogd, check the /var/log/kern.log or /var/log/messages file. With journald, run journalctl -ek.

To capture this logging to its own file, you can “tail” these messages via the dmesg command’s -w (follow) flag:

# touch /var/log/wireguard-iptables.log
# dmesg -wT | grep 'wireguard iptables:' >> /var/log/wireguard-iptables.log

This will allow you to track the remote IP addresses that are connecting to your local WireGuard interface. A WireGuard handshake and short encrypted HTTP request and response will look like this:

[Sat Mar  6 20:45:15 2021] wireguard iptables: IN=eth0 OUT= MAC=06:24:d3:09:8d:9b:06:01:1a:2a:77:f7:08:00 SRC=203.0.113.2 DST=198.51.100.1 LEN=176 TOS=0x08 PREC=0x80 TTL=64 ID=39062 PROTO=UDP SPT=51820 DPT=51820 LEN=156
[Sat Mar  6 20:45:15 2021] wireguard iptables: IN= OUT=eth0 SRC=198.51.100.1 DST=203.0.113.2 LEN=120 TOS=0x08 PREC=0x80 TTL=64 ID=48534 PROTO=UDP SPT=51820 DPT=51820 LEN=100
[Sat Mar  6 20:45:15 2021] wireguard iptables: IN=eth0 OUT= MAC=06:24:d3:09:8d:9b:06:01:1a:2a:77:f7:08:00 SRC=203.0.113.2 DST=198.51.100.1 LEN=124 TOS=0x00 PREC=0x00 TTL=64 ID=39063 PROTO=UDP SPT=51820 DPT=51820 LEN=104
[Sat Mar  6 20:45:15 2021] wireguard iptables: IN= OUT=eth0 SRC=198.51.100.1 DST=203.0.113.2 LEN=124 TOS=0x00 PREC=0x00 TTL=64 ID=48535 PROTO=UDP SPT=51820 DPT=51820 LEN=104
[Sat Mar  6 20:45:15 2021] wireguard iptables: IN=eth0 OUT= MAC=06:24:d3:09:8d:9b:06:01:1a:2a:77:f7:08:00 SRC=203.0.113.2 DST=198.51.100.1 LEN=124 TOS=0x00 PREC=0x00 TTL=64 ID=39064 PROTO=UDP SPT=51820 DPT=51820 LEN=104
[Sat Mar  6 20:45:15 2021] wireguard iptables: IN=eth0 OUT= MAC=06:24:d3:09:8d:9b:06:01:1a:2a:77:f7:08:00 SRC=203.0.113.2 DST=198.51.100.1 LEN=204 TOS=0x00 PREC=0x00 TTL=64 ID=39065 PROTO=UDP SPT=51820 DPT=51820 LEN=184
[Sat Mar  6 20:45:15 2021] wireguard iptables: IN= OUT=eth0 SRC=198.51.100.1 DST=203.0.113.2 LEN=124 TOS=0x00 PREC=0x00 TTL=64 ID=48536 PROTO=UDP SPT=51820 DPT=51820 LEN=104
[Sat Mar  6 20:45:15 2021] wireguard iptables: IN= OUT=eth0 SRC=198.51.100.1 DST=203.0.113.2 LEN=268 TOS=0x00 PREC=0x00 TTL=64 ID=48537 PROTO=UDP SPT=51820 DPT=51820 LEN=248
[Sat Mar  6 20:45:15 2021] wireguard iptables: IN= OUT=eth0 SRC=198.51.100.1 DST=203.0.113.2 LEN=412 TOS=0x00 PREC=0x00 TTL=64 ID=48538 PROTO=UDP SPT=51820 DPT=51820 LEN=392
[Sat Mar  6 20:45:15 2021] wireguard iptables: IN=eth0 OUT= MAC=06:24:d3:09:8d:9b:06:01:1a:2a:77:f7:08:00 SRC=203.0.113.2 DST=198.51.100.1 LEN=124 TOS=0x00 PREC=0x00 TTL=64 ID=39066 PROTO=UDP SPT=51820 DPT=51820 LEN=104
[Sat Mar  6 20:45:15 2021] wireguard iptables: IN=eth0 OUT= MAC=06:24:d3:09:8d:9b:06:01:1a:2a:77:f7:08:00 SRC=203.0.113.2 DST=198.51.100.1 LEN=124 TOS=0x00 PREC=0x00 TTL=64 ID=39067 PROTO=UDP SPT=51820 DPT=51820 LEN=104
[Sat Mar  6 20:45:15 2021] wireguard iptables: IN= OUT=eth0 SRC=198.51.100.1 DST=203.0.113.2 LEN=124 TOS=0x00 PREC=0x00 TTL=64 ID=48539 PROTO=UDP SPT=51820 DPT=51820 LEN=104
[Sat Mar  6 20:45:25 2021] wireguard iptables: IN=eth0 OUT= MAC=06:24:d3:09:8d:9b:06:01:1a:2a:77:f7:08:00 SRC=203.0.113.2 DST=198.51.100.1 LEN=60 TOS=0x00 PREC=0x00 TTL=64 ID=39108 PROTO=UDP SPT=51820 DPT=51820 LEN=40

In the above output, 198.51.100.1 is the IP address of the ethernet interface on the local host, and 203.0.113.2 is the IP address of the remote WireGuard endpoint (the remote endpoint is also listening on port 51820, but the above iptables rules would capture similar output even if the remote endpoint was on some other port).

You can also use iptables to log the packets that are sent inside the WireGuard tunnel. Run the following commands to log packet headers sent through the tunnel to and from the system itself (where wg0 is the name of your WireGuard interface):

# iptables -I INPUT -i wg0 -j LOG --log-prefix 'tunnel wireguard iptables: ' --log-level 7
# iptables -I OUTPUT -o wg0 -j LOG --log-prefix 'tunnel wireguard iptables: ' --log-level 7

And run the following commands to log packer headers sent through the tunnel to and from other hosts (if the system is operating as a router for other hosts on its network):

# iptables -I FORWARD -i wg0 -j LOG --log-prefix 'tunnel wireguard iptables: ' --log-level 7
# iptables -I FORWARD -o wg0 -j LOG --log-prefix 'tunnel wireguard iptables: ' --log-level 7

This will allow you to track exactly what is being sent through your WireGuard virtual private network. The short HTTP request and response from above will look like this when logging the packets within the tunnel:

[Sat Mar  6 20:45:15 2021] tunnel wireguard iptables: IN=wg0 OUT= MAC= SRC=10.0.0.2 DST=10.0.0.1 LEN=60 TOS=0x00 PREC=0x00 TTL=64 ID=25937 DF PROTO=TCP SPT=34770 DPT=8080 WINDOW=62167 RES=0x00 SYN URGP=0
[Sat Mar  6 20:45:15 2021] tunnel wireguard iptables: IN= OUT=wg0 SRC=10.0.0.1 DST=10.0.0.2 LEN=60 TOS=0x00 PREC=0x00 TTL=64 ID=0 DF PROTO=TCP SPT=8080 DPT=34770 WINDOW=62083 RES=0x00 ACK SYN URGP=0
[Sat Mar  6 20:45:15 2021] tunnel wireguard iptables: IN=wg0 OUT= MAC= SRC=10.0.0.2 DST=10.0.0.1 LEN=52 TOS=0x00 PREC=0x00 TTL=64 ID=25938 DF PROTO=TCP SPT=34770 DPT=8080 WINDOW=972 RES=0x00 ACK URGP=0
[Sat Mar  6 20:45:15 2021] tunnel wireguard iptables: IN=wg0 OUT= MAC= SRC=10.0.0.2 DST=10.0.0.1 LEN=129 TOS=0x00 PREC=0x00 TTL=64 ID=25939 DF PROTO=TCP SPT=34770 DPT=8080 WINDOW=972 RES=0x00 ACK PSH URGP=0
[Sat Mar  6 20:45:15 2021] tunnel wireguard iptables: IN= OUT=wg0 SRC=10.0.0.1 DST=10.0.0.2 LEN=52 TOS=0x00 PREC=0x00 TTL=64 ID=2583 DF PROTO=TCP SPT=8080 DPT=34770 WINDOW=969 RES=0x00 ACK URGP=0
[Sat Mar  6 20:45:15 2021] tunnel wireguard iptables: IN= OUT=wg0 SRC=10.0.0.1 DST=10.0.0.2 LEN=206 TOS=0x00 PREC=0x00 TTL=64 ID=2584 DF PROTO=TCP SPT=8080 DPT=34770 WINDOW=969 RES=0x00 ACK PSH URGP=0
[Sat Mar  6 20:45:15 2021] tunnel wireguard iptables: IN= OUT=wg0 SRC=10.0.0.1 DST=10.0.0.2 LEN=349 TOS=0x00 PREC=0x00 TTL=64 ID=2585 DF PROTO=TCP SPT=8080 DPT=34770 WINDOW=969 RES=0x00 ACK PSH FIN URGP=0
[Sat Mar  6 20:45:15 2021] tunnel wireguard iptables: IN=wg0 OUT= MAC= SRC=10.0.0.2 DST=10.0.0.1 LEN=52 TOS=0x00 PREC=0x00 TTL=64 ID=25940 DF PROTO=TCP SPT=34770 DPT=8080 WINDOW=970 RES=0x00 ACK URGP=0
[Sat Mar  6 20:45:15 2021] tunnel wireguard iptables: IN=wg0 OUT= MAC= SRC=10.0.0.2 DST=10.0.0.1 LEN=52 TOS=0x00 PREC=0x00 TTL=64 ID=25941 DF PROTO=TCP SPT=34770 DPT=8080 WINDOW=966 RES=0x00 ACK FIN URGP=0
[Sat Mar  6 20:45:15 2021] tunnel wireguard iptables: IN= OUT=wg0 SRC=10.0.0.1 DST=10.0.0.2 LEN=52 TOS=0x00 PREC=0x00 TTL=64 ID=2586 DF PROTO=TCP SPT=8080 DPT=34770 WINDOW=969 RES=0x00 ACK URGP=0

In the above output, the IP address of local WireGuard interface is 10.0.0.1, and the IP address of the remote WireGuard peer is 10.0.0.2. An HTTP server is running on port 8080 of the local host, which the remote host is connecting to through the WireGuard tunnel (using the ephemeral TCP port 34770 inside the tunnel).

You can use the iptables logging on UDP port 51820 (the first example) to keep track of the external IP addresses that are connecting to your WireGuard network; and the iptables logging on the wg0 interface (the last example) to track which peers are using your network (and what they’re accessing inside the network).

You can remove iptables rules by running the same command you used to add them, except replacing the -I flag (or the -A flag for appended rules) with the -D flag. For example, you can remove the last two rules added above by running the following commands:

# iptables -D FORWARD -i wg0 -j LOG --log-prefix 'tunnel wireguard iptables: ' --log-level 7
# iptables -D FORWARD -o wg0 -j LOG --log-prefix 'tunnel wireguard iptables: ' --log-level 7

To check for active rules that you may want to remove, run iptables-save (iptables-save doesn’t actually save anything, it just dumps all active rules in a format that can be saved and restored).

Continue reading WAY TO VIEW WIREGUARD LOGS
, , ,

Enable Root Login via SSH In Ubuntu

 By default, SSH on Ubuntu comes configured in a way that disables the root users log in. This was originally enabled as a security precaution which means that you cannot directly log in as the root user over SSH. However, you can usually get around the need for root ssh login by using the sudo command. In some cases, though it’s just more convenient to get directly logged in as root.

Enable root login over SSH

  1. Login to your server as root.
  2. As the root user, edit the sshd_config file found in /etc/ssh/sshd_config:vim /etc/ssh/sshd_config
  3. Add the following line to the file, you can add it anywhere but it’s good practice to find the block about authentication and add it there.
    PermitRootLogin yes
  4. Save and exit the file.
  5. Restart the SSH server:
    systemctl restart sshd
    or
    service sshd restart

And that’s it! With the new line added and the SSH server restarted, you can now connect via the root user.

In this instance, you are going to be able to login as the root user utilizing either the password or an ssh key.

When using SSH Keys, you can set the PermitRootLogin value to `without-password` instead of yes. To accomplish this, simply modify the following information noted in step 2 above instead:

PermitRootLogin without-password

This process should work on almost any version of Linux server that the sshd service is installed. If you are using a cPanel server though you can easily control this setting from the WHM interface. In these cases, it’s recommended to modify this setting from your control panel interface.


Continue reading Enable Root Login via SSH In Ubuntu
, ,

How to Run a Script on Startup in Ubuntu?

 Sometimes, we need to perform specific tasks every time the system starts or reboot the script is executed automatically on startup to avoid the user performing those tasks manually. The startup script allows the user to schedule and automate several tasks simultaneously.

To run the script on startup in Ubuntu, the executable files are put in the startup folder to perform a specific task when the system starts. This post will discuss how to modify the system files to run scripts on startup with the help of the following topics:


Method 1: Run Script on Startup Using Systemd File

We can modify the systemd file to run a script on startup by following the below steps:

Step 1: Create a Bash Script

Create a bash script file named “StartScript.sh” to get all the details about the user, which will run automatically on startup:

#!/bin/bash
 
echo "Kernel Version: $(uname -a)" > /etc/kernelinfo.txt

Note: Make sure the script file is executable, using the following command:

$ chmod a+x StartScript.sh

Step 2: Create a systemd Service

Create a new startup Systemd File within the “/etc/systemd/system” system file having the “.service” extension.

For instance, /etc/systemd/system/ScriptService.service file is created using the following command in the nano editor:

$ sudo nano /etc/systemd/system/ScriptService.service

Write the below content to run the bash script “StartScript.sh” on startup:

[Unit]
Description=Custom Startup Script
 
[Service]
ExecStart=/home/ubuntu/StartScript.sh
 
[Install]
WantedBy=default.target
  • Unit: It stores the metadata and other information you want to store related to the script.
  • Service: Tells the system to execute the desired service, which will run on startup.
  • Install: Allows the service to run the WantedBy directory at the startup to handle the dependencies.

Step 3; Set Permissions of the Service File

Set the user executable file permissions (in this case, binary mode of permissions) for the Service unit file using the following command:

Note: In binary mode, Read=4, Write=2, and Execute=1.

$ chmod 644 /etc/systemd/system/ScriptService.service
  • 6: Provides read and write permissions to the user.
  • 4: Provides read permissions to the group and others.

Step 4: Enable the Service

Use the below-stated command to enable the customized service (which allows the execution on each startup):

$ systemctl enable ScriptService.service

Every time the system starts/reboots, the script file will execute automatically and display all the user information in the /etc/kernelinfo.txt file.

Method 2: Run Script on Startup Using Cron Job

The cron job can be created to run on startup. For instance, to run a script that executes the user details when the system reboot or restarts, follow the below steps:

Step 1: Open the crontab File

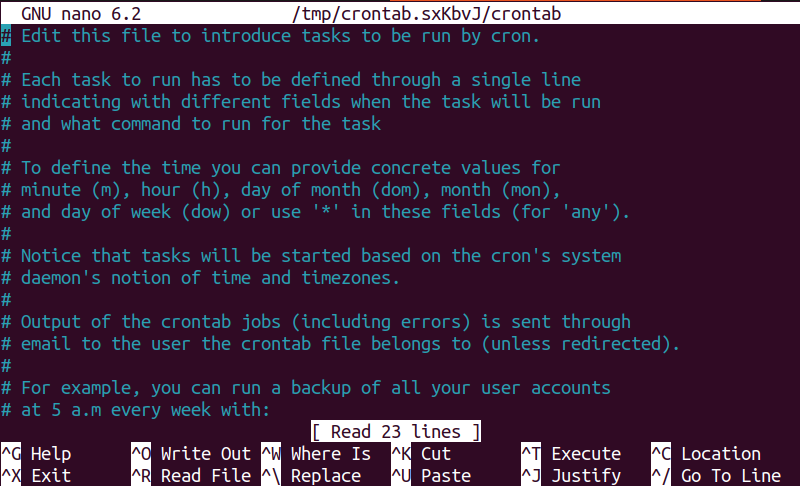
Open the crontab file by running this command in the terminal:

$ sudo crontab -e

Note: If you are opening the crontab file for the first time, the system will ask you to specify the text editor in which the crontab will be opened. Select the desired editor by entering the number written in front of every editor.

Step 2: Add a cron Job

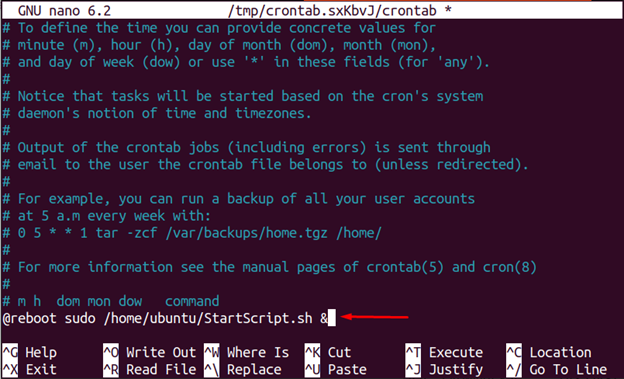
Add a new crontab job to execute on startup by entering the following code in the crontab file:

Note: StartScript.sh is the same script that was used in the last section; provide the full path of the script file.

$ @reboot sudo /home/ubuntu/StartScript.sh &

After adding the code, Press the “Ctrl + O” to save, then “Enter” to save the file name, and then press the “Ctrl + X” keys to exit the editor.

The cron job is successfully saved to run the script (print user details) on startup.

Method 3: Run Script on Startup Using rc.local File

The rc.local file can also be used to run the script on startup. To run the desired script on reboot/startup, use the following steps:

Note: The below first two steps will be performed in case there is no “/etc/rc.local” file which can be checked by using the “ls /etc/rc.local” command. In the absence of this directory, it will show blank output, else the directory path.

Step 1: Create rc.local File

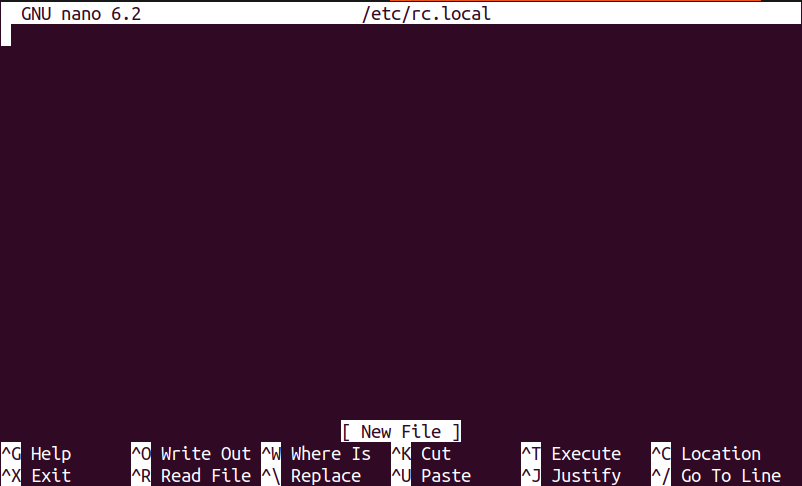
Create the “/etc/rc.local” file in the nano editor using the below-mentioned command:

$ sudo nano /etc/rc.local

Press “Ctrl + O” to save the file, then press the “Enter” key to save the anime, and press the “Ctrl + X” key to exit the editor.

Step 2: Create an rc-local Service

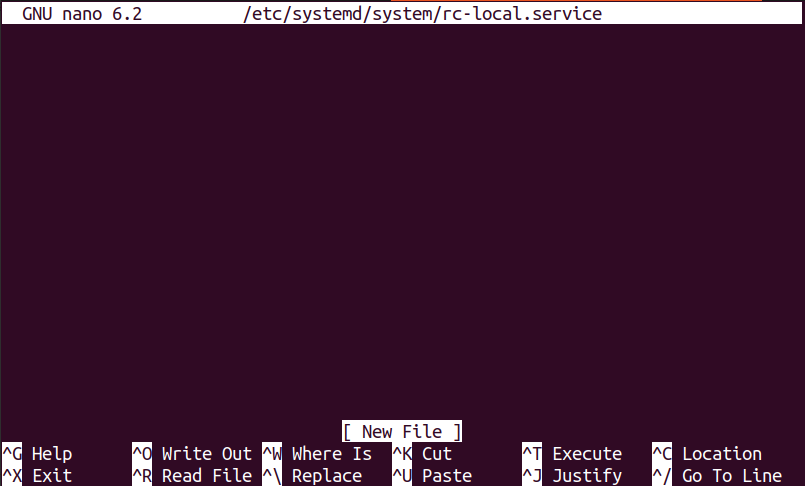
Create the rc-local service file to manage this service in the default system file “/etc/systemd” by using this command:

$ sudo nano /etc/systemd/system/rc-local.service

Now, press the “Ctrl + O” to save, the “Enter” and “Ctrl + X” to exit.

Step 3: Make the rc.local File executable

Change the rc.local file permissions to make it executable by running the below command:

$ sudo chmod +x /etc/rc.local

Step 4: Edit the rc.local File

Open the rc.local file in the nano editor (to add the startup script) by using the following command:

$ sudo nano /etc/rc.local

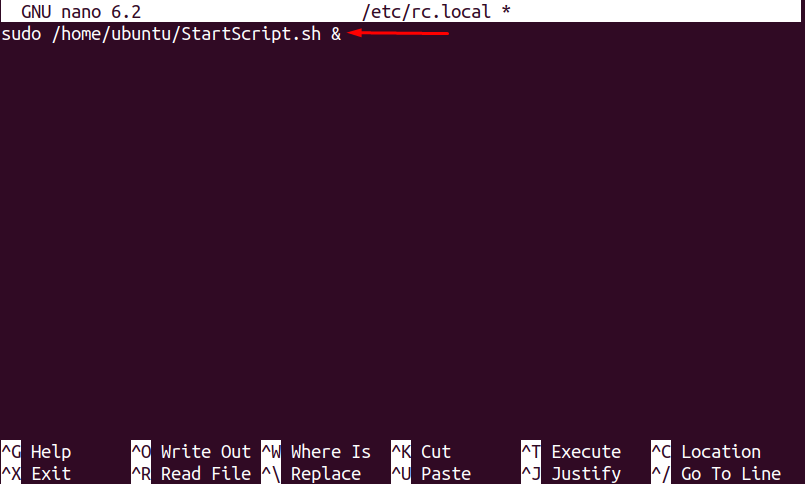
Add the following command in the rc.local file as shown in the below picture:

Note: Replace the “StartScript.sh” with your desired script file name.

sudo /home/ubuntu/StartScript.sh &

Press the “Ctrl + O” to save, the “Enter” and “Ctrl + X” to exit.

The script is saved in the rc.local file, which will automatically run every time the system reboots/starts.

Conclusion

To run the desired script on startup, several methods are used, which include modifying the “systemd”, “cron”, and “rc.local” files. In the systemd method, the desired script is created, added script as a service, and enabled the service to run on startup. Moreover, the script job is added to the crontab file, and the service is added to the rc.local file to run the scripts on startup. This post has addressed numerous methods to run a script on startup in Ubuntu.

Continue reading How to Run a Script on Startup in Ubuntu?