Showing posts with label Networking. Show all posts
,

Restart Network Service on CentOS 8 or RHEL 8

This tutorial will help you to Start/Stop and Restart the network services on a CentOS 8 or RHEL 8 Linux system. Here are the two methods available. We prefer method 1 to use.


Method 1 – Using NetworkManager Service

Use the followings commands to start/stop network service on your CentOS/RHEL 8 Linux system.


sudo systemctl start NetworkManager.service
sudo systemctl stop NetworkManager.service


Use the followings commands to restart network service on your CentOS/RHEL 8 Linux system.


sudo systemctl restart NetworkManager.service

Method 2 – Using nmcli Tool

The nmcli is the command-line utility for the managing NetworkManager on CentOS/RHEL 8 Linux system. You can simply use this utility to stop/start network service on your CentOS 8 or RHEL 8 system.


WARNING – Do not run nmcli networking off for the remotely connected systems. This will disable the NetworkManager network connections on the machine and you will lose connection.
sudo nmcli networking off
sudo nmcli networking on


The above command will disable/enable the network connections on CentOS 8 or RHEL 8 Linux system.

Continue reading Restart Network Service on CentOS 8 or RHEL 8
, ,

Inbound Rate Limiting on Cisco Catalyst Switches


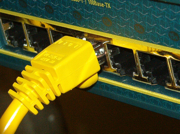
Cisco Catalyst Switch Port Close-UpIf you need to limit the inbound bandwidth of a switch port on a Cisco Catalyst, the key is in the QoS configuration. Rather than going into an depth discussion of QoS and how it works, let’s skip that (check out Cisco’s QoS site for that level of detail) and jump into the configuration details. This particular configuration was done on a Cisco Catalyst 2960.

As I mentioned, the key is QoS. The first thing you need to do is globally enable QoS with the mls qos configuration command. Once this command is enabled, QoS is enabled on all ports with default settings.

Next, we’ll need an access-list to match traffic on. In this example, we are going to police all traffic coming through the switch port, so our access-list will match all IP addresses.

ip access-list extended ACL_SLAP
permit ip any any

A class map is necessary to classify our traffic.

class-map match-all CLASS_SLAP
match access-group name ACL_SLAP

The policy map dictates what we want done to the traffic class previously defined. The police configuration command sets our rate limit in this example to 8 Mbps the a burst size of 100 KB. The burst size is the trickiest part of this command. If the burst is set too low, your traffic will not be able to approach the maximum allowed throughput do to packet drops.

Because TCP window scaling halves the window size for each dropped packet, it’s important to set the burst size at a level that doesn’t impact performance. The rule of thumb is that the burst size should be double the amount of traffic sent at the maximum rate at a given round-trip time. In this example, I assumed a round-trip time of 50 ms which results in a burst size of 100 KB.

policy-map POLICY_SLAP
class CLASS_SLAP
police 8000000 100000 exceed-action drop

Finally, apply the policy-map to the switch port with the service-policy configuration command.

interface GigabitEthernet0/2
service-policy input POLICY_SLAP

And now you’re done. In our example, we configured a switch port to only allow inbound traffic at 8 Mbps. We won’t be able to truly max the 8 Mbps, but we should come close. I’ve created a full text example that should be ready to copy and paste.

Leave a comment and let me know how it goes for you.

Continue reading Inbound Rate Limiting on Cisco Catalyst Switches
, ,

How would you limit the bandwidth on a switch port?


Edit: this configuration doesn’t seem to be that simple, because it’s not working very well on my 3560 now.

Edit #2: It turns out everything works as stated, except for the minor fact that the command slows your interface down.

Go into interface configuration mode, on the port you are making changes on.

switch(config-if)#srr-queue bandwidth ?
limit Configure bandwidth-limit for this interface
shape Configure shaping on transmit queues
share Configure shared bandwidth

These is what the IOS help is showing; you can see that there are more options than merely limiting the bandwidth.

switch(config-if)#srr-queue bandwidth limit ?
<10-90> enter bandwidth limit for interface as percentage

The percentage value range that should be entered, ranging from 10 to 90. The default is 100.

Therefore, a workaround to limit the switch port’s speed to 5mbps would be to do the following instead:

switch(config-if)#speed 10

switch(config-if)#srr-queue bandwidth limit 50

*Remember that this will slow your interface down, as it’s reduced from a 100mbps interface to a 10mbps interface instead.

Continue reading How would you limit the bandwidth on a switch port?
,

Header Structure of RTP


The following figure shows the RTP header structure -

RTP header structure

  • version (V): 2 bits
    This field identifies the version of RTP. The version is 2 upto RFC 1889.
  • padding (P): 1 bit
    If the padding bit is set, the packet contains one or more additional padding octets at the end which are not part of the payload. The last octet of the padding contains a count of how many padding octets should be ignored. Padding may be needed by some encryption algorithms with fixed block sizes or for carrying several RTP packets in a lower-layer protocol data unit.
  • extension (X): 1 bit
    If the extension bit is set, the fixed header is followed by exactly one header extension.
  • CSRC count (CC): 4 bits
    The CSRC count contains the number of CSRC identifiers that follow the fixed header.
  • marker (M): 1 bit
    Marker bit is used by specific applications to serve a purpose of its own. We will discuss this in more detail when we study Application Level Framing.
  • payload type (PT): 7 bits
    This field identifies the format (e.g. encoding) of the RTP payload and determines its interpretation by the application. This field is not intended for multiplexing separate media.
  • sequence number: 16 bits
    The sequence number increments by one for each RTP data packet sent, and may be used by the receiver to detect packet loss and to restore packet sequence. The initial value of the sequence number is random (unpredictable).
  • timestamp: 32 bits
    The timestamp reflects the sampling instant of the first octet in the RTP data packet. The sampling instant must be derived from a clock that increments monotonically and linearly in time to allow synchronization and jitter calculations.
  • SSRC: 32 bits
    The SSRC field identifies the synchronization source. This identifier is chosen randomly, with the intent that no two synchronization sources within the same RTP session will have the same SSRC identifier.
  • CSRC list: 0 to 15 items, 32 bits each
    The CSRC list identifies the contributing sources for the payload contained in this packet. The number of identifiers is given by the CC field. If there are more than 15 contributing sources, only 15 may be identified. CSRC identifiers are inserted by mixers, using the SSRC identifiers of contributing sources.
Continue reading Header Structure of RTP